This page shows you all users who have access to your merchant dashboard including their roles. This is also the section where you set up a new user, edit, reset the password or delete a user.
How To Set Up Users
Setting up users on your Apxium dashboard is simple and easy. You can set up as many users as you like under the users' page.
On your Apxium dashboard:
- Click the Admin menu and go to the Users tab to bring you to the User Management page.
- Click the Add Users button to set up a username and password.
- By default, a new user has merchant administrator access you are able to edit permission and assign roles for each user in order to limit the particular person’s ability when using the Apxium Merchant dashboard. Untick the Merchant Administrator box and select permissions from the drop-down menu. Hover to each role to show you their specific functions. Note that you can select multiple roles as needed.
- Key in names and offices they manage if need be. This is very useful, especially for bigger firms that have a lot of users. This allows you to keep track of your users much more easily.
- If you require MFA for all users, simply tick the MFA Enrollment Required box.
A user with a full admin role [Merchant Administrator tick box is ticked] will have Full admin access and can set up users too.
If unticked and Admin Role is selected from the drop-down menu, 'Admin' does not have any ability to add/manage any user on the dashboard.
A quick video below shows you how it works.
User Roles List
| Role: Admin | Full admin Except for user management (unable to add users) |
|
Role: Apxium Collect - View Only
|
Read-only access to all of the Collect |
| Role: Apxium Collect - Take Payments | Take payments against an Invoice and take VPOS payments |
|
Apxium Collect - Add Debtor Payment Method
|
Allows a payment method to be added to be used for APX Auto Invoice |
| Apxium Collect - Edit Debtor Notes | Create Notes and Reminders |
| Apxium Collect - Make SOR Offers | Allows the creation of the SOR instalment offer for a debtor |
| Apxium Collect - Make Standard Installment Offers | Allows the creation of a standard (Non-SOR) instalment offer for a debtor |
| Apxium Collect - Manage Debtor Comms | Allows Comms to be enabled or disabled for a debtor |
| Apxium Collect - Attach PDF to Unsent Invoice | Allows a PDF to be attached to unsent invoices |
| Engagements - Edit | Create and edit Engagements |
| Engagements - Send | Send and Re-send Engagements |
| Engagements - Edit Templates | Create and edit Engagement templates |
There are new Engagement and AuditSafe permissions listed for users. Please note that the listed permissions depend on the Apxium Product/s enabled on your system so irrelevant privileges are not listed.
It is also possible to add any unlisted privileges by typing in the raw name or remove privileges from a role by typing the privilege name with a minus before it.

You can also refer to the User Privilege Raw Names List.
Once the user has been set up, they would have to go to the Apxium login page and reset
their password.
Please refer your users to the following pages on how to log in or access their Apxium dashboard.
Logging into the Apxium Merchant Dashboard
Editing/Deleting A User and Resetting Password Within the Merchant Dashboard
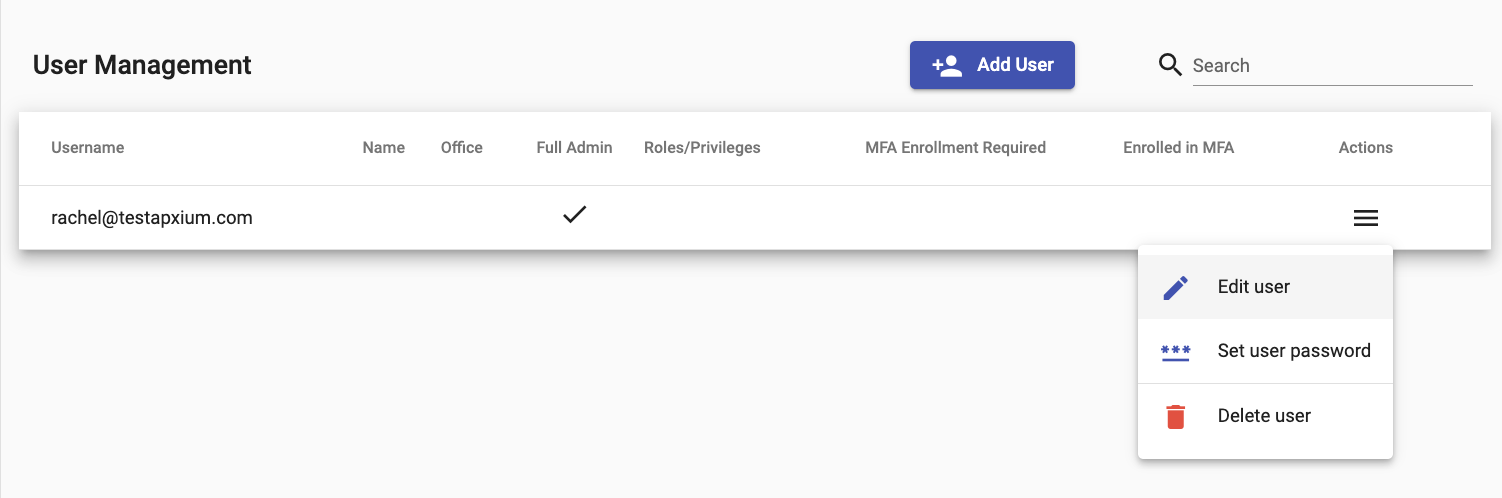
Simply go to the Actions column and click on the hamburger menu to show you the list of action you can do. You can select Edit to edit user details, and Set User Password if you need to reset or change the password or Delete a User.
Users Page (Old/Legacy View)
This will be retiring soon. Note that if you currently have a user with "Partner" access only (no transactional capability), it is not possible to set up a single user (i.e. one username) for multiple partners as the partner access is designed for a specific partner to see their own list of debtors.
It is recommended to use the new Users page under the Admin menu if you wish to set up specific permission per user.