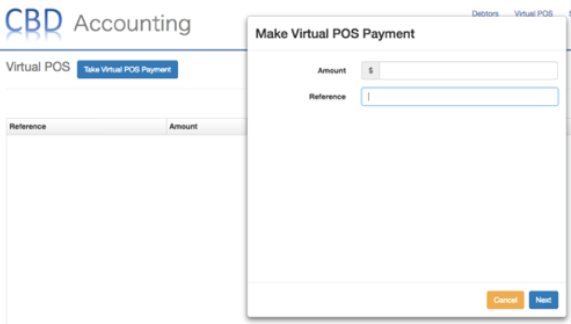
When you use the Virtual POS and the payment is successful, you will need to mark it manually as Paid on your accounting package once you created an invoice. This is because the Virtual POS is only to be used to make a payment for any invoice that is NOT in Apxium, hence Apxium would not know where to allocate it.
I.e. The client wants to make a payment right away for a certain job but no invoice yet in Apxium, then you can use this function.
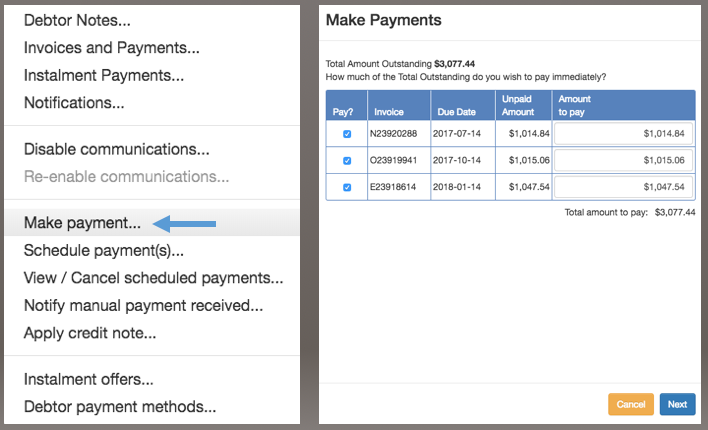
When there is an invoice in Apxium and you need to apply a payment, “Make Payment” button is the best tool to use as that will then allocate the payment automatically. You are able to select which invoice to pay and change the amount they wish to settle.
If in any case that you used the Virtual POS instead of Make Payment and the invoice is already in Apxium dashboard, you have to mark the invoice as paid in Xero and the payment will sync within 1-2 hours to Apxium dashboard.
Additionally, any external payment you receive (such as EFT, cash, cheque) must be processed by you on your accounting package and the payment will flow through to Apxium dashboard. No payment receipt will be sent to the client.
Make Payment function is only to be used when there is an outstanding invoice in Apxium hence you won’t be able to use this function for:
-
any APX Auto invoice,
-
any invoices under payment plans,
-
any invoices with scheduled payments and
-
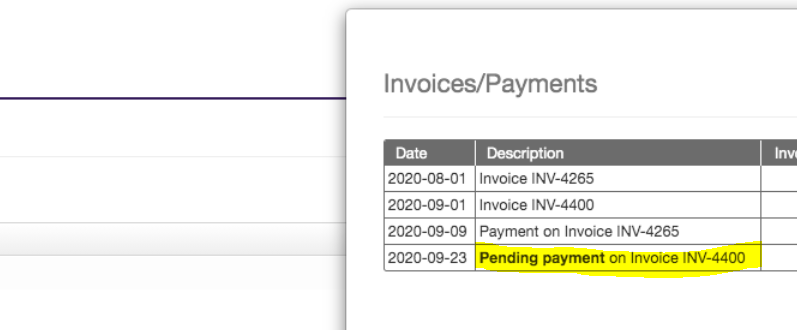
invoices with pending payments status like the case below.