STEP 1 - Locate the relevant payment that you would like to cancel/void by selecting Payment History on the Dashboard menu.

STEP 2 - Scroll down the page to locate the relevant transaction or enter the Transaction ID, Cardholder’s name, Amount etc. in the search bar to pull up the payment you want to void.
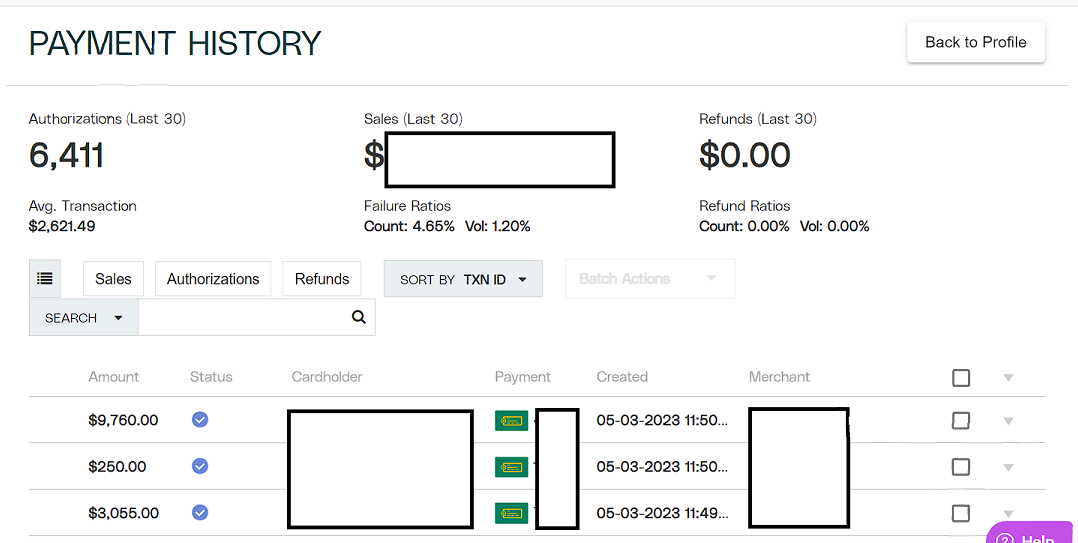
STEP 3 - When the relevant transaction is selected from the Payment history, you will be redirected to the payment’s profile page.
If the transaction status is Approved, you can void or cancel the payment.
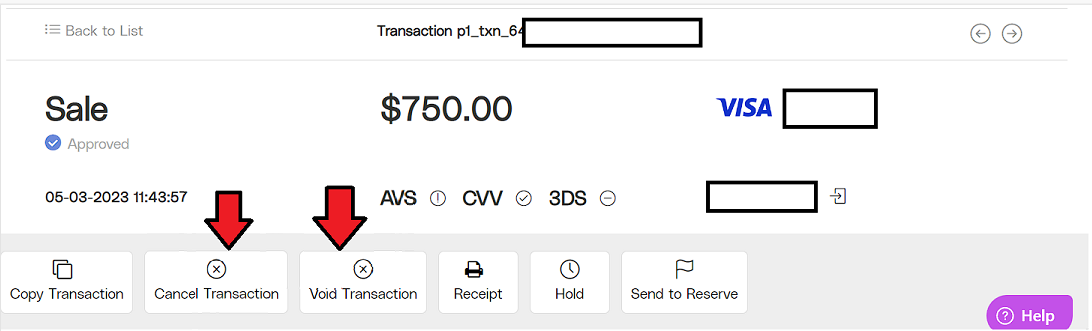
To make sure it’s the right transaction, highlight transaction ID and checked on Apxium Payments>Facility ID.

STEP 4 - Hit the Void Transaction button and enter the amount to void.

STEP 5 - Void button will no longer be visible. A related transaction with a unique Transaction ID (TXN ID) and profile page will be created within Payrix, in addition to the original payment’s profile.
IMPORTANT INFORMATION:
Any approved transactions voided/cancelled at the same day before 7PM EST, no transaction will go through and no funds will be collected.
If the Transaction status is Captured, then the funds will go through. You may choose the “Refund” icon option.
Void Transaction for Credit Card payments so that the approved payment will be excluded from your daily batch and reverse the authorization.
Cancel Transaction for ACH to prevent the transaction from going through and being charged to the account. The account holder may see a hold in their account for funds but this should drop off after a few days.
Payments are instantly allocated to Star, hence you need to un-allocate the payment of the original invoice and make a negative against the payment.
Once the invoice is un-allocated in Star, it will sync to Apxium and will appear as payable for the client to pay again.