How to create an Invoice that will be recognized as Auto Pay
The Apxium system will recognize any invoice that has a template name; APX Auto and treat this invoice or invoices as Auto Pay invoices
It does not matter whether you use APXauto or APX Auto or some variation
MYOB AE/AO Guide for Auto Pay
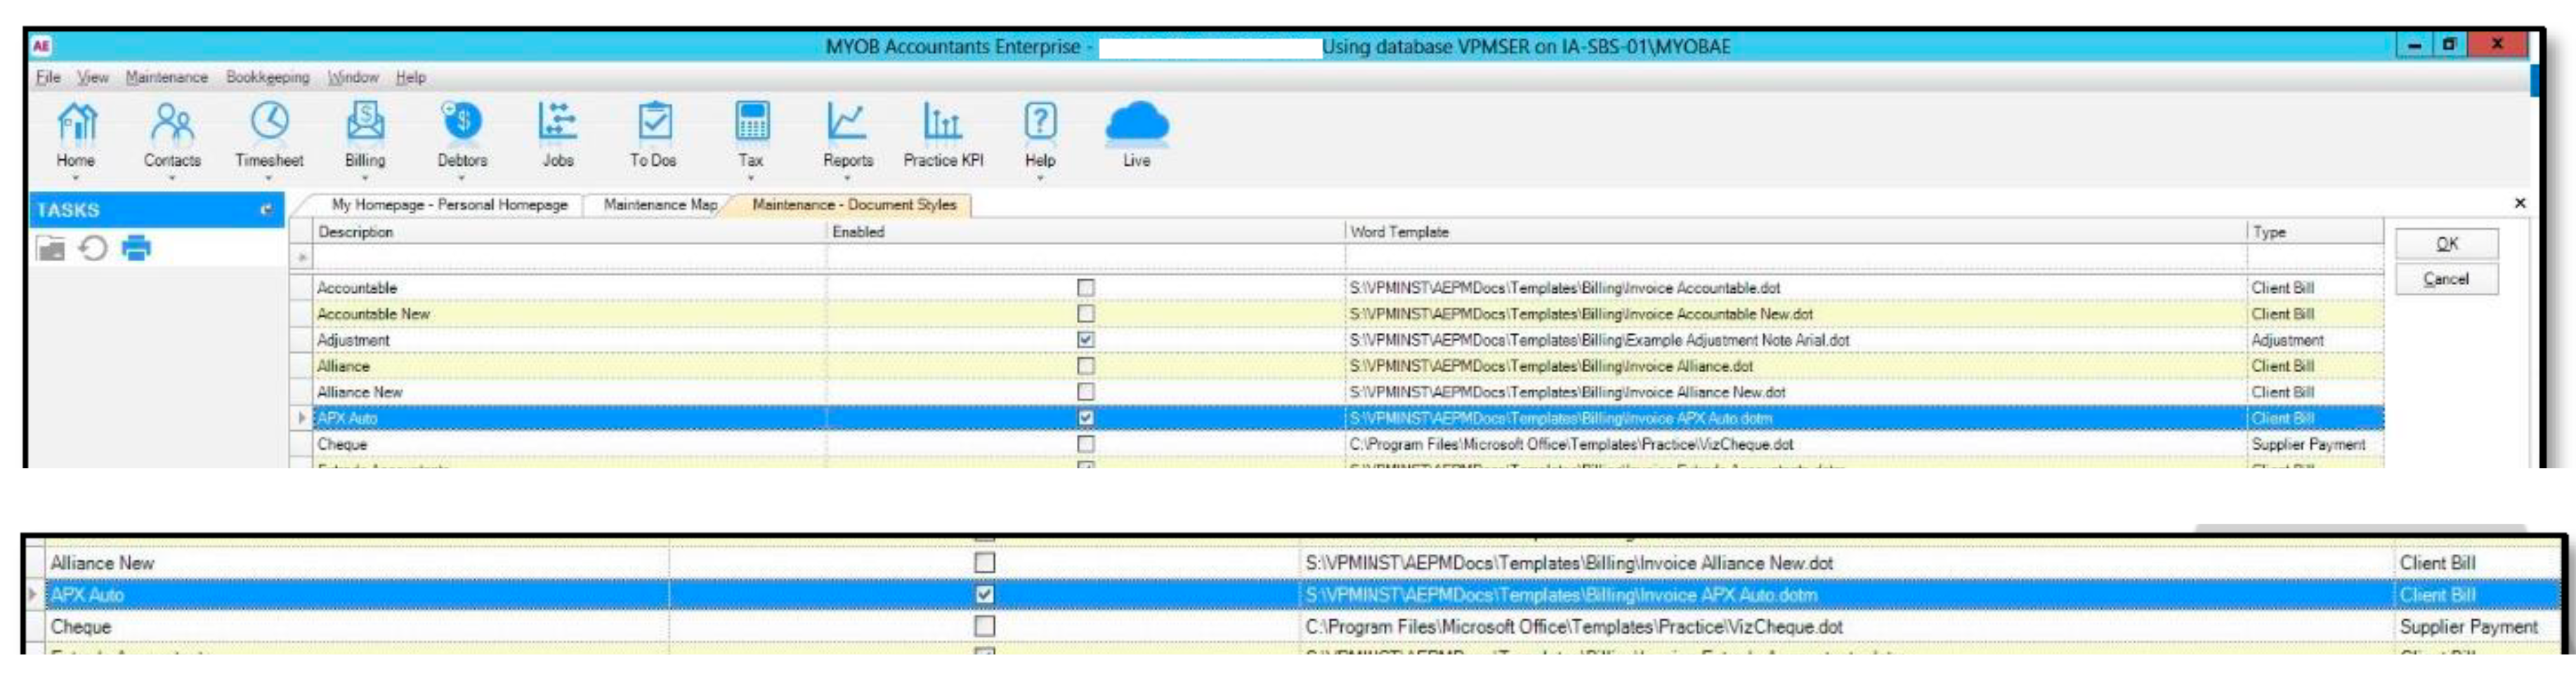
It is very simple to create a new invoice template, by creating it in the “Maintenance-Document Styles” tab. Simply create a new invoice template and name it APX Auto.
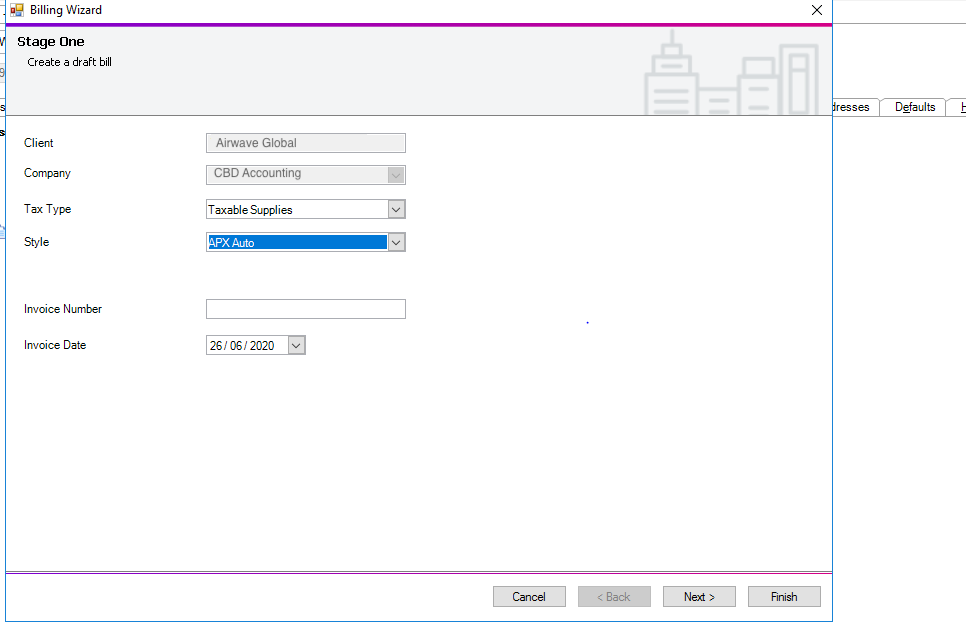
When creating a new invoice, simply apply APX Auto theme/style to your invoice.
When an APX Auto invoice is generated by Apxium after posting in MYOB AE/AO, the HTML invoice will not have the green “Payment Options” button on it rather it will have been replaced by the statement, “This invoice will be automatically paid using your nominated payment method on the invoice due date.

For any new invoice, both ad-hoc or standing orders, you can apply the APX Auto template/style.
If you wish to set up a recurring invoice for Auto Pay, you need to set it up as a standing order or recurring invoice in your accounting system.
Xero [Blue] Guide for Auto Pay
How to Create an "APX Auto" Invoice Theme in Xero
Follow the steps below to create a new branding theme for Direct Debit invoices via APX Auto:

-
-
Sign in to your Xero account using your credentials.
-
Click on the Settings menu.
-
Select Invoice Settings from the dropdown options.
-
Under the Branding Themes section, click on “New Branding Theme”
-
Enter APX Auto as the name of your new branding theme. (You may copy the layout from an existing theme or make any customisation as needed.)
-
Click Save to create the new branding theme.
-
Apply the APX Auto Branding Theme to Invoices
-
-
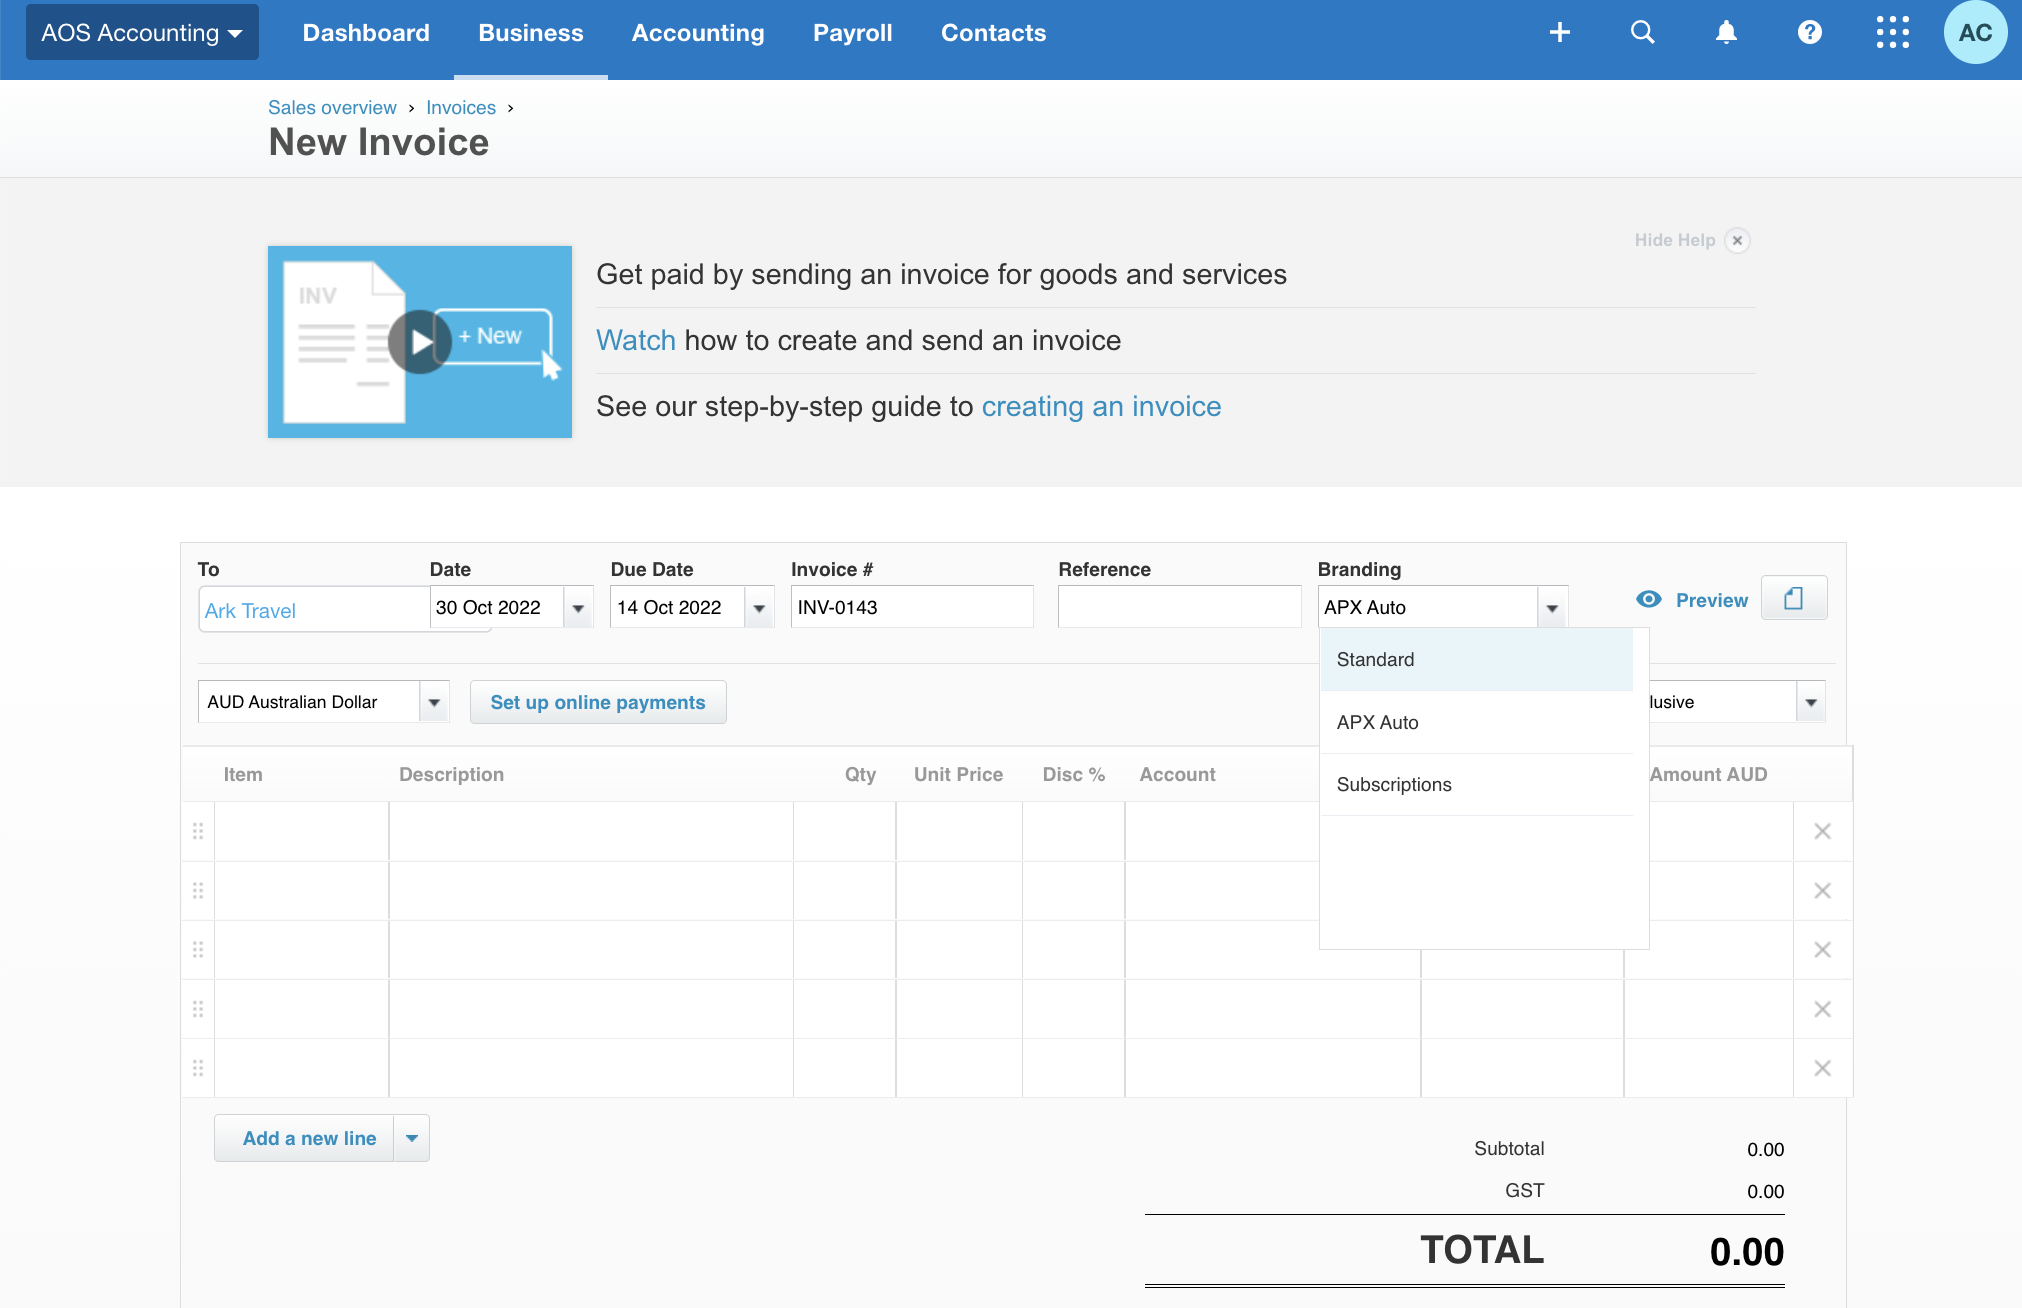
When creating a new invoice or scheduling repeating invoices, make sure to select APX Auto under the Branding Theme dropdown instead of Standard.
-
This ensures the invoice is recognised and processed as a Direct Debit through APX Auto.
-
Additional Note/Disclaimer in the APX Auto Invoice Template
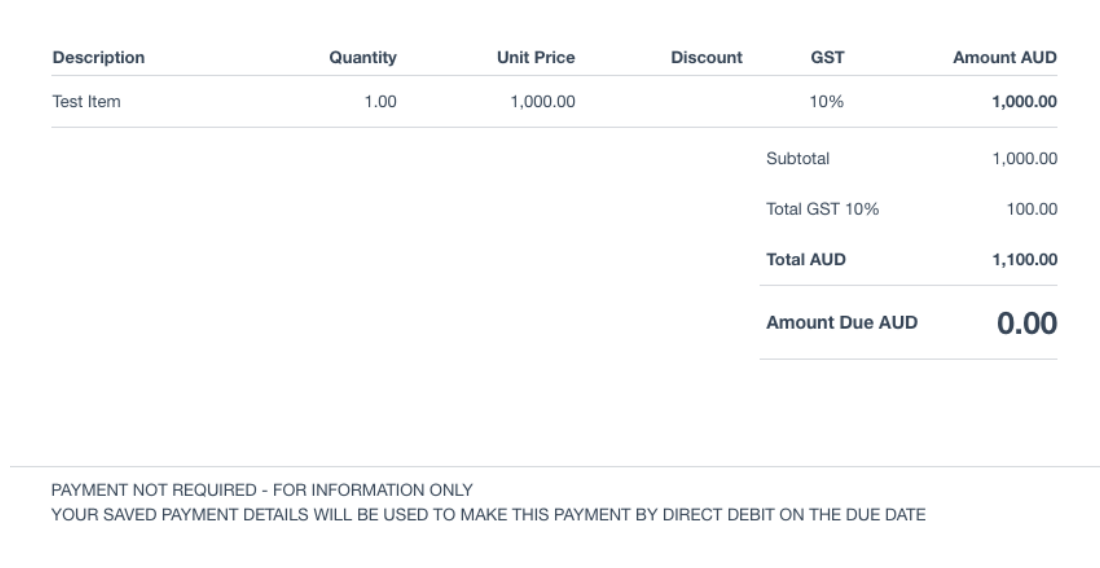
When creating the APX Auto invoice branding theme, we recommend to include a clear statement that the invoice is sent for information and that their saved payment details will be used to automatically pay the invoice on the due date.
You can add this message to the “Terms & Payment Advice” or Footer section of the invoice template to ensure it appears clearly on each issued invoice. Including this statement helps manage client expectations and reinforces that no manual payment action is required.
Sample disclaimer that will appear on their PDF invoice:
Below is the standard email that Apxium sent with PDF Invoice attached.

GreatSoft - Guide for Auto Pay
When creating an invoice in GreatSoft, a line item must be added with “APXAuto” description (without any space) and has a $0 dollar amount in order for the system to recognise it as a direct debit invoice.

STAR - Guide for Auto Pay
To enable the APXAuto functionality, you need to create an invoice template with the name of APXAuto and confirm with us once it’s done.
We then need to put the name of the template into the configuration for the firm. Once in the configuration, our system will recognize it as APXAuto.
The Apxium system will recognize any invoice that has a template name; APX Auto. And treat this invoice or invoices as Auto Pay invoices.
Note: It does not matter whether you use apx auto or APX Auto or some variation, but we need to have the name listed in the configuration.
Also, if using both Web and Windows billing, you will need to create two templates and hence the names will be different e.g. APXAutoWeb and APXAutoWindows or 1 and 2 etc.
You can have as many as you want in case you want to have different ones for different entities or clients or work, etc. As long as we list those template names in the Config, we will know they are APXAuto.
You can apply the APXAuto template to both ad-hoc and recurring invoices in Star.
Your Star invoices should make it clear that they are presented only for the client’s information and not for payment. There is no click-through link to their payment portal included.
We would suggest that the template used for APXAuto have the payment link removed and instead have a statement on the PDF that states “This invoice will be automatically paid using your nominated payment method <# of days> after the invoice issue date" or something similar, to ensure your clients are fully informed.
TESTING
Initially, we advise a test APXAuto invoice be created for a test client to allow you to see how it progresses through the various stages to the final debiting of the amount and posting in Star.
We can monitor this with you if you wish.